AgricultureAgriculture
  • Solutions
    • Solutions
    • Workflows
      • Workflows
      • Overview
      • Land Preparation
      • Planting & Seeding
      • Crop Protection
      • Nutrient Management
      • Water Management
      • Harvest
    • Additional Solutions
      • Additional Solutions
      • Positioning Services
      • ISOBUS
      • Enterprise
  • Products
    • Products
    • Hardware
      • Hardware
      • All Hardware
      • Displays
      • Guidance Control
      • Steering Systems
      • Application Control
      • Land Forming
      • Subsurface Drainage
    • Software & Apps
      • Software & Apps
      • All Software & Apps
      • Trimble Ag Software
      • Advisor Prime
      • Data Warehouse
      • Land Forming
      • Subsurface Drainage
      • Connected Climate Exchange
    • Correction Services
      • Correction Services
      • Positioning Services
  • Partners
    • Partners
    • Developers
      • Developers
      • Ag Developer Network
      • Ag Apps
      • Software Integration APIs
      • Precision-IQ Extensions
    • Manufacturers
      • Manufacturers
      • OEMs
      • Trimble Select
    • Distributors
      • Distributors
      • Become a Reseller
  • Learn
    • Learn
    • Resources
      • Resources
      • All Resources
      • Blog
      • FAST App
      • Virtual Farm
    • Support
      • Support
      • All Support
      • Software FAQs
      • Release Notes
  • About Us
    • About Us
    • Our Company
    • Blog
    • Press Releases
    • Sustainability
  • How to Buy
AgricultureAgriculture
  • Solutions
    • WORDFLOWS

    • ADDITIONAL SOLUTIONS

    • Overview
    • Positioning Services
    • Land Preparation
    • ISOBUS
    • Planting & Seeding
    • Enterprise
    • Crop Protection
    • Nutrient Management
    • Water Management
    • Harvest
  • Products
    • HARDWARE

    • SOFTWARE & APPS

    • CORRECTION SERVICES

    • All Hardware
    • All Software & Apps
    • Positioning Services
    • Displays
    • Trimble Ag Software
    • Guidance Control
    • Advisor Prime
    • Steering Systems
    • Data Warehouse
    • Application Control
    • Land Forming
    • Land Forming
    • Subsurface Drainage
    • Subsurface Drainage
    • Connected Climate Exchange
  • Partners
    • DEVELOPERS

    • MANUFACTURERS

    • DISTRIBUTORS

    • Ag Developer Network
    • OEMs
    • Become a Reseller
    • Ag Apps
    • Trimble Select
    • Software Integration APIs
    • Precision-IQ Extensions
  • Learn
    • RESOURCES

    • SUPPORT

    • All Resources
    • All Support
    • Blog
    • Software FAQs
    • FAST App
    • Release Notes
    • Virtual Farm
  • About Us
    • Our Company
    • Blog
    • Press Releases
    • Sustainability
  • How to Buy
  1. How-to Central
  2. Search Results
  3. Manage map layers with Field Manager (GIS) online

Manage map layers with Field Manager (GIS) online

With Trimble Ag Software, you can use online filters to turn map layers on and off, overlaid on boundaries across your farm. Adjust layers to view field and crop boundaries, benchmarks, guidance lines, landmarks, as-applied coverage maps, Crop Health Imagery, as well as management zones and vehicle tasks.

  1. Log in to your account online (learn more)
  2. Select the preferred crop year (top left)
  3. Click Jump to field and select the field name

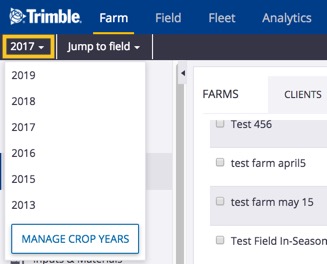
    • if two fields with the same name are shown, choose the field with a crop listed
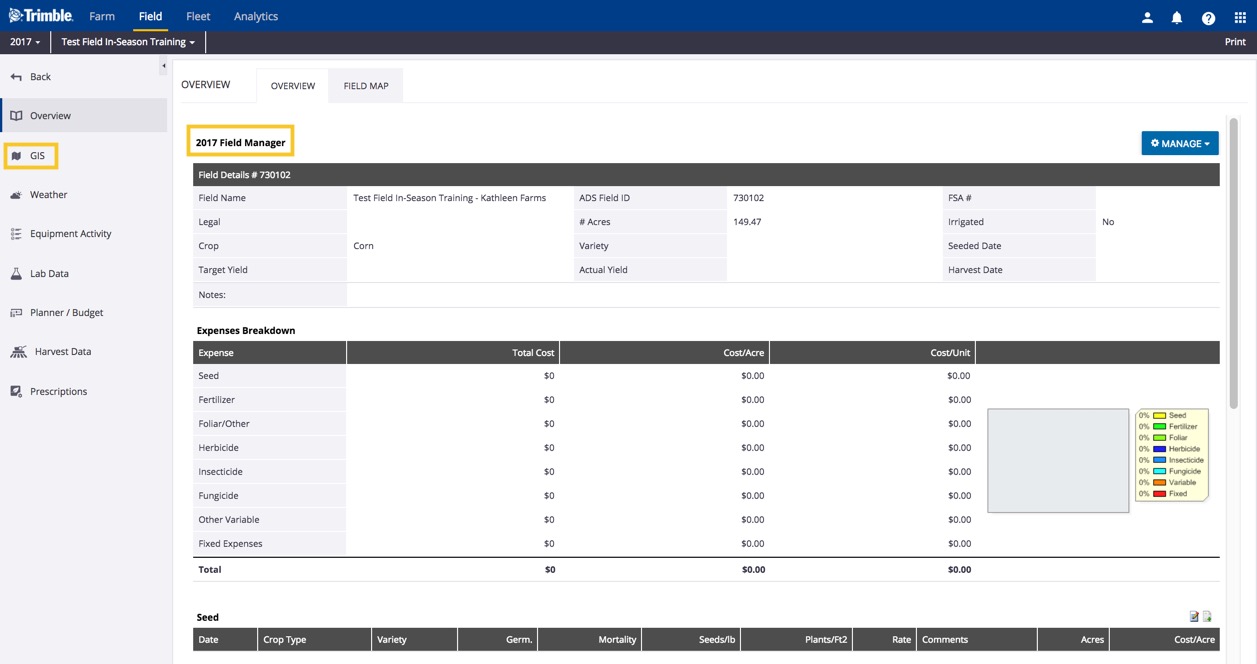
    • if you don’t see your field on the list (shows the first 20 fields), go to the Field menu and select Field Profiler, then click on the name of the field to open the Field Manager
    • as an alternative, you can go directly to the GIS editor screen by going to the Farm menu and select Farms, then click on the Fields tab and click the edit icon  next to a field name
      • Note: the direct-to-GIS method may not work if you see and select fields that were already deleted using the Field Profiler but were not yet retired as assets on the Farm menu
  4. From the Field Manager screen, select GIS from the left navigation menu
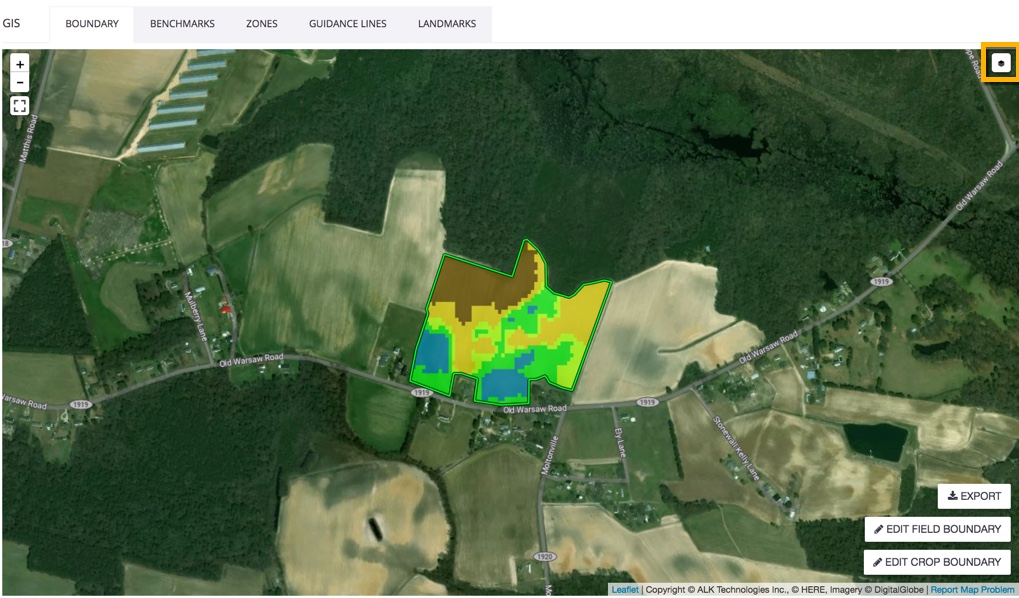
  5. From the Boundary tab, click the layers  icon (top right)

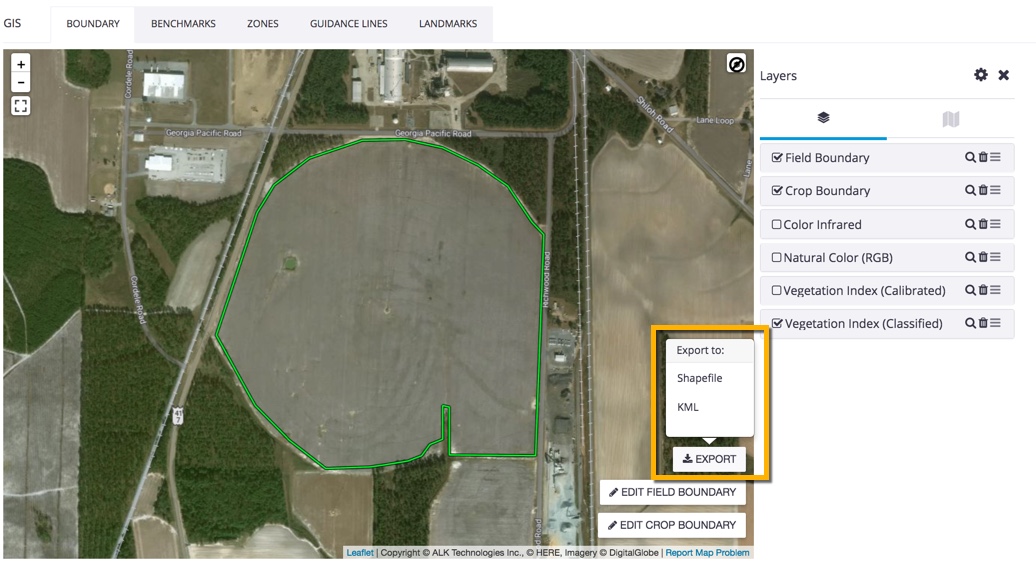
  6.  On the Layers selection pane now visible to the right of the map, select from the following options:

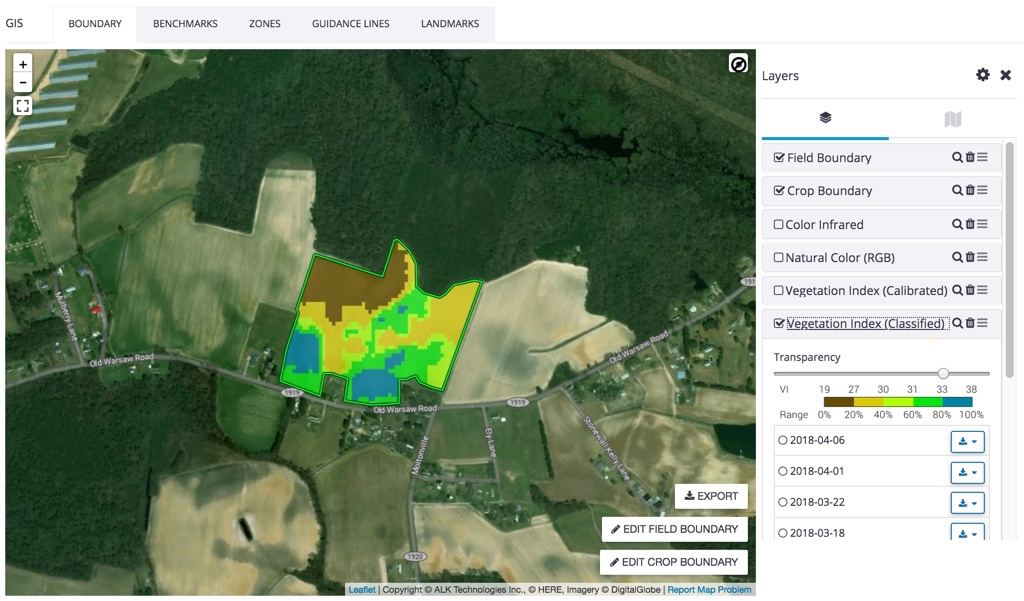
    • Manage Layers – click the gear  icon to display the Manage Layers pop-up window, then click an arrow to expand/collapse categories, and check one or more categories then click Save (or Cancel)

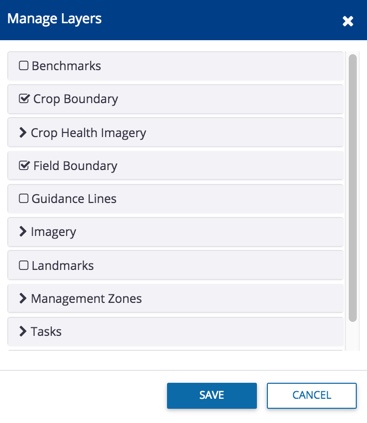
      • Benchmarks – GPS locations for points or pins on a map
      • Crop boundary – tillable area, in some cases, may be smaller than a field boundary
      • Crop Health Imagery – in-season imagery to identify areas of stronger and weaker productivity, available in four indeces:
        • Color Infrared
          • Vegetation is seen in red
          • Highlights the vegetation variability
          • More than 80% of vegetation response is in NIR (near infra-red)
        • Natural Color (RGB)
          • Identifies the objects in the field
          • Facilitates the ground truthing of vegetation index values
          • Same color seen by our eyes
        • Vegetation Index (Calibrated)
          • Calibrated Index
          • Enables day-to-day and field-to-field comparisons
          • Corrects for soil noise background
          • Flows into Advisor Prime
          • Scale 0 – 120 (non-vegetation to dense vegetation)
        • Vegetation Index (Classified)
          • 5 classes of equal area
          • Relative scale to accentuate whatever crop variability exists in a field
          • Optimize drones flights
          • Can be used for prescription
          • Enables target scouting and tissue sampling
      • Guidance Lines – paths used by vehicles or implements for position accuracy
      • Imagery – view GeoTIFF images uploaded from the Field > Files menu
      • Landmarks – benchmarks, polygons and boundaries that identify non-tillable area
      • Management Zones – pattern of zones classifying spatial variability within a field
      • Tasks – as-applied coverage maps from vehicle display data
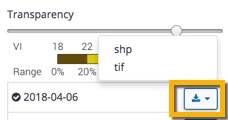
    • Transparency – click to adjust the slider bar to change map layer from opaque to transparent, when viewing multiple layers at the same time
    • Layers by date – scroll down to view files by date, then click to view a single layer at a time, with the option to download the selected layer in SHP (Shapefile) or TIF (GeoTIFF) format
  7. Click the Export button (bottom right corner of map) to download a single selected date layer in SHP (Shapefile) or KML (Keyhole Markup) format.

Related: Learn more about editing boundaries here.


Search How-To Central:

How-To Central Categories

Support
Get your questions answered
Authorized dealers
Locate or contact Trimble resellers
Careers
Work at Trimble
SOLUTIONS
  • Land Preparation
  • Planting & Seeding
  • Crop Protection
  • Nutrient Management
  • Water Management
  • Harvest
PRODUCTS
  • Displays
  • Guidance control
  • Steering systems
  • Flow & application control
  • Land forming
  • Subsurface drainage
  • Software
PARTNERS
  • Developers
  • Distribution
  • OEMs
  • Trimble Select
SUPPORT
  • Contact Trimble
  • Resources
  • Release Notes
  • Facebook – Trimble Agriculture logo
  • Instagram – @trimble_ag logo
  • Twitter – @trimble_ag logo
  • LinkedIn – Trimble Agriculture logo
  • YouTube – Trimble Agriculture logo
Trimble Logo
© 2022, Trimble Inc.

Trimble is an industrial technology company transforming the way the world works by delivering solutions that enable our customers to thrive. Core technologies in positioning, modeling, connectivity and data analytics connect the digital and physical worlds to improve productivity, quality, safety, transparency and sustainability. From purpose built products to enterprise lifecycle solutions, Trimble is transforming industries such as agriculture, construction, geospatial and transportation.

  • Legal
  • Terms of Use
  • Terms of Sale
  • Privacy Center
  • Do Not Sell My Information
  • English