Add fields on the mobile app
With the mobile app’s automatic map coordinates, plus many of the same features that are available online, you can easily add fields and associated farms on your Trimble Ag Software account using your phone or tablet, with or without cellular or wi-fi coverage. To associate a client name with a farm created on the mobile app, update the Field Profile details online when you’re back in the office.
- Log in to the mobile app with the same Trimble ID used to access your online account (learn more)
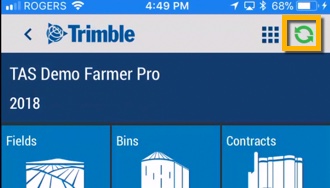
- From the mobile app’s home screen, select the preferred crop year (top left)
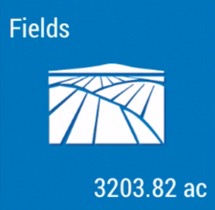
- Tap the Fields tile
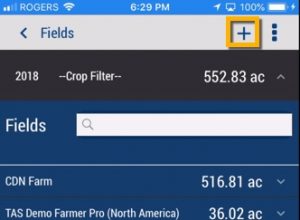
- Tap the plus
 icon on the top right corner of the screen to add a new field
- On the New Field editor screen, tap to enter or select details outlined below:
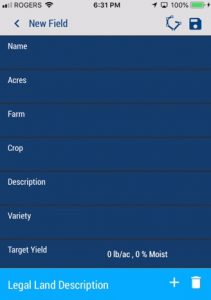
- Name – (required) tap to enter the new field name
- Acres – (required) tap to enter a number (may be shown as hectares, depending on your settings)
- Note: this number will auto-update once a boundary shape
 is added to the field details (learn more)
- Note: this number will auto-update once a boundary shape
- Farm – tap to select from the list of farms on your account, or tap Create Farm to add a new farm to the list (or tap Dismiss)
- Crop – (required) tap to search or select from All, My Materials or Purchased crops available (or tap the back arrow to return to the previous screen)
- Description – if shown, tap Select a Crop Description (also known as Subcrop) to view options for the selected crop (if blank, the system has no corresponding description; continue to the next item)
- Variety – if shown, tap Select a Crop Variety to view options for the selected crop description (if blank, the system has no corresponding variety; continue to the next item)
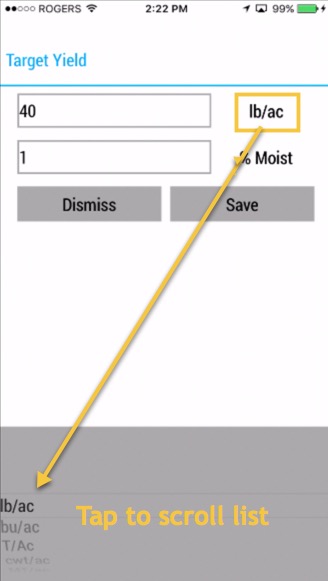
- Target Yield – tap the default 0 lb/ac, 0 % Moist measurements shown to display the Target Yield editor screen, then enter a number and tap a unit of measure to scroll and select options for both yield and moisture rate, then tap Save (or Dismiss)
- Tap the plus
 icon next to Legal Land Description (also known as reference points used by land surveys and land title records);

- On the Legal Land Description editor screen, tap to enter or select details outlined below (note: regional options are displayed based on the Province or State and Country selected in your account Profile online):
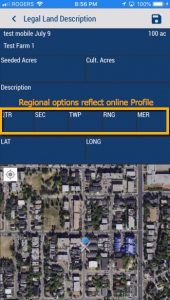
- Seeded Acres (also known as Tillable Area) – tap to enter the number (may be shown as hectares, depending on your settings) to show the seeded/tillable area as different from the boundary area (for example, when a field has less planting space due to ongoing issues such as flooding, etc.)
- Cultivated Acres – tap to enter the number (may be shown as hectares, depending on your settings) if different from Seeded/Tillable Area or Boundary Area
- Description – tap add any notes such as text that defines the legal boundaries of your property
- Land system references – tap to enter any legal land coordinates (note: regional options are displayed based on the Province or State and Country selected in your account Profile online)
- LAT and LONG – automatically update the latitude and longitude coordinates by moving the map under the white X, or tap the white compass
 icon on the top left corner of the map to move to show your current location
- Note: latitude and longitude coordinates are tracked for record-keeping purposes only; boundaries are required if you want to use your mobile device’s built-in GPS to navigate to a field location, or zoom into fields on the maps
- Tap the disc
 icon (top right) to save changes
- If Seeded Acres were entered, you may also be prompted with options to update the area for the field:
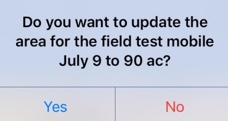
- Select Yes to overwrite the field acres to match the Seeded Acres, which also updates the Field Manager Overview online
- Select No to keep the Seeded Acres as a separate measurement, visible only when viewing records under the Legal Land Description on the mobile app
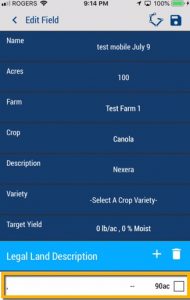
- If Seeded Acres were entered, you may also be prompted with options to update the area for the field:
- Sync changes with the online account when you’re within cellular or wi-fi range, by returning to the home screen and tapping the green sync
 icon (top right)
