Install Trimble Ag Desktop software
Before installing Trimble Ag Desktop software, make sure you have already reviewed the system requirements, activated your desktop license online, and downloaded the installation files from our website for Windows (or Windows emulator for Mac). If this is all new to you, let us walk you through the steps in our printable QuickStart Guide for Trimble Ag Desktop.
To automatically run the Windows installer:
1. Click the file name to run the TAS Office*****.exe file from the download pane at the bottom of your screen (or from your Downloads folder).
2. Select your preferred language and region from the dropdown lists and click OK
3. Review and accept the License Agreement terms by clicking Yes
4. Choose the destination for the software installation by clicking Browse, or click Next to accept the default location (c:\farmproj)
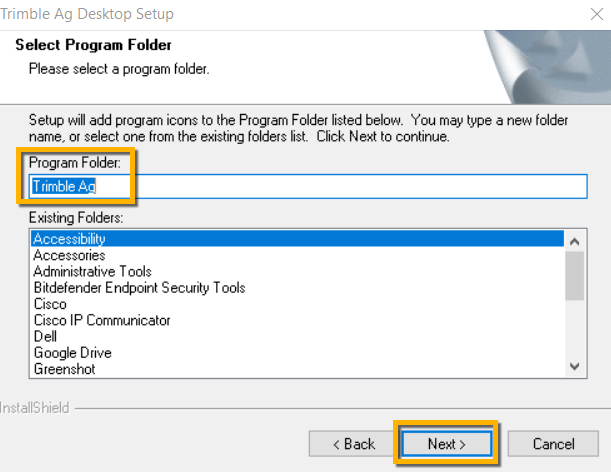
5. Select the Program Folder for the software installation by clicking an item in the Existing Folders list, or click Next to accept the default location (Trimble Ag)

6. At the login window, enter your Trimble ID email address and password used by your account Organization Owner
7. Review the list of licenses and expiration dates purchased when you activated your desktop license (click Refresh to see recent purchases such as the Annual Software Maintenance Plan)
-
-
- Note: only click Add License if you have an existing account and your list shows Update Support Plan or Annual Maintenance Plan
- Tip: if you don’t see your licenses in the list, sign in to your online account to confirm that you can view your Current Licenses in the online Marketplace (under the Farm menu); if none are shown, click the person icon (top right in the online account) to see if you have more than one organization and check your Current Licenses again, which will confirm if a different email address is associated with your desktop software purchase
- If a different email address was used for your purchase, contact our support team for assistance with completing the software installation
- Note: for licenses from 2017 or earlier, you may be prompted to enter a Proof of Purchase Code (POPN) or CD Key provided with the purchase of your software. For help with missing POPN codes or CD registration keys for older software licenses, contact our support team.
- Note: only click Add License if you have an existing account and your list shows Update Support Plan or Annual Maintenance Plan
-
8. Click Finish to start the installation (may take several minutes)
-
-
- Note: if you’re using the WM-Subsurface™ add-on, you may also be prompted to install Microsoft® Direct X® components to view 3D maps (review the agreement, click I accept the agreement and click Next, then click Finish)
-
9. At the final prompt, safely eject any USBs or CDs from your computer, then select Yes, I want to restart my computer now
10. Click Finish to complete the installation
11. Wait for your computer to restart
12. From your computer’s Start menu, select the program Trimble Ag Software, or click the Trimble ![]() icon on your desktop
icon on your desktop
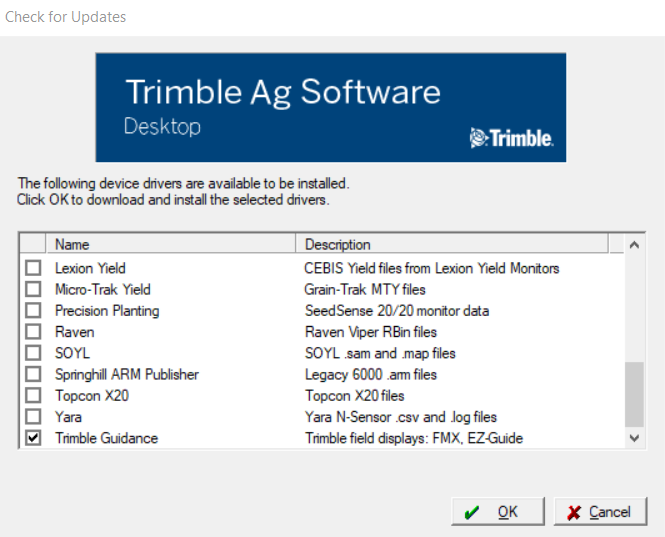
13. When you use the software for the first time, you’ll be prompted to select any third-party data sources from the list (click OK to download your preferred drivers so that Trimble Ag Desktop can process those data types)

14. Click Yes to accept any installation prompts for each of your selected drivers, then click Yes to restart your computer at the prompt
Once your computer restarts, launch the desktop software — no password required — to begin working on your farm project (learn more).
