Using Work Orders
Eliminate the whiteboard and lengthy operational meetings with Work Orders in Trimble Ag Software. Farm managers can take the guesswork out of operations management, with online and mobile app tools to identify tasks, set priorities, assign tasks to workers, and monitor progress and completion.
Use the Trimble Ag Mobile to build work orders for your team, including associated fields, materials, equipment and weather restrictions, and assign it to an operator from your account contacts, including a planned start and end date. Keep track of progress as your operators start, pause and complete assigned work orders, with automated summaries that roll up into Trimble Ag Online.
Once you’ve activated your Trimble Ag Software account online and downloaded the mobile app, make sure that you have the following set up:
- Activate the free Work Orders module in the online Marketplace
- A Field
- A Contact to assign a work order to, who has mobile access to Work Orders
- Vehicle or Implements if you are going to be creating an order with Equipment
Quick Steps
- Go to the Home screen
- Tap the year to select preferred Crop Year
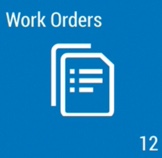
- Tap Work Orders tile
- Select a Field name
- Tap the + Add icon (top right corner)
- Tap + Add Field (required)
- Select one or more fields (required)
- Tap the disk icon to save (required)
- Enter a Task Name (required)
- Select an Operation if different from the default (Unknown)
- Tap the Materials icon to add Chemicals, Fertilizers, and Seeds (if present)
- Tap the Tractor icon to add Vehicles and Implements
- Tap the People icon to assign an Operator (shows all Contacts, not just Equipment Operators from People)
- Select a Planned Date and Expiry Date if different from the default (required)
- Tap and enter Weather Restrictions
- Tap to enter Crop Stage
- Enter Comments
- Tap the disk icon to save
Step-by-Step
- Log in to the mobile app with the same Trimble ID used to access your online account (learn more)
- From the mobile app’s home screen, select the preferred crop year (top left)
- Swipe up to view all tiles and tap the Work Orders tile
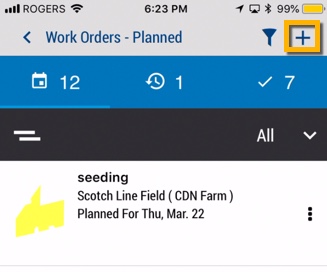
- In the Work Orders-Planned screen, tap the add + icon to add a new record
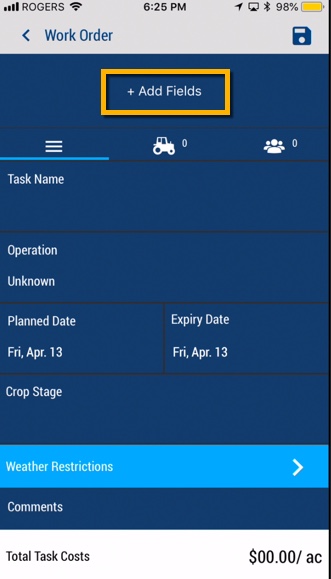
- In the Work Orders screen, tap + Add Fields (required)
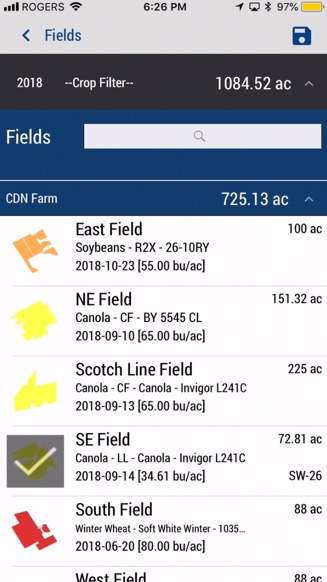
- From the Fields list, tap to check one or more fields (or tap again to remove a check mark)
- Tap the disc
 icon to save the selection (required)
- On the Work Orders screen, tap to enter or select the options below:
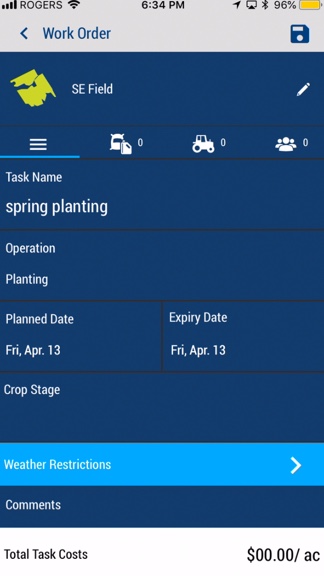
- Pencil
 icon – modify the list of fields associated with this work order
- Task Name (required) – enter a name
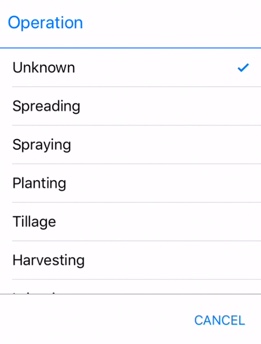
- Operation – tap to select from the dropdown list (default is Unknown)
- Tap the materials
 icon, then tap the plus
 icon
icon
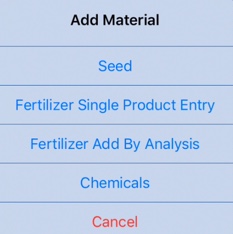
- Select an item from the list (or tap Cancel)
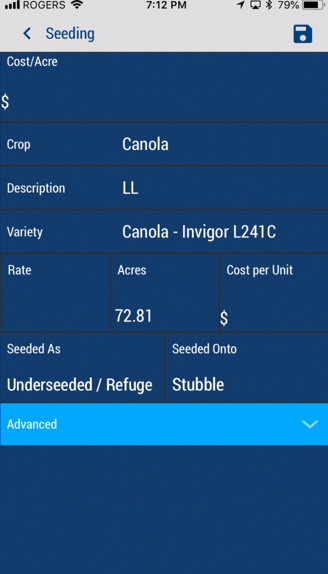
- Edit the Seeding screen (learn more), then tap the disc
 icon to save changes (or tap the back arrow) to return to the previous screen
- Continue adding fertilizer and chemicals, as needed, to the Materials screen, then tap the disc
 icon to save changes (or tap the back arrow) to return to the previous screen
- Tap the tractor
 icon, then tap the plus
 icon
icon
- Select an item from the list, Vehicle or Implement (or tap Cancel)
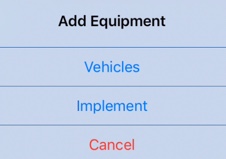
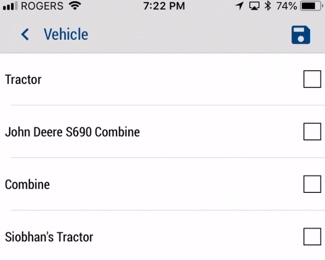
- Tap a check box to select one or more vehicles assigned to your account (learn more), then tap the disc
 icon to save changes (or tap the back arrow) to return to the previous screen
- Tap the people
 icon to, then tap the plus
 icon
icon
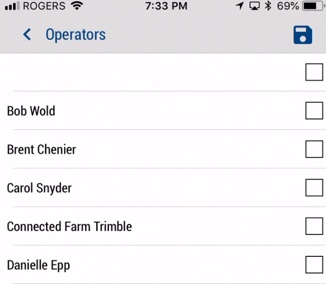
- Tap a check box to select one or more Operators assigned to your account (displays all contacts and equipment operators assigned to your account; learn more), then tap the disc
 icon to save changes (or tap the back arrow) to return to the previous screen
- Planned Date and Expiry Date (required) – tap to select new dates (both default to today’s date)
- tap the Tractor Icon to Add Equipment
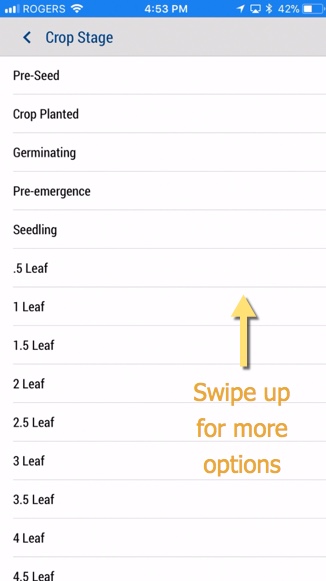
- Crop Stage – tap to select from the list (or tap the < back arrow to return to the previous screen)
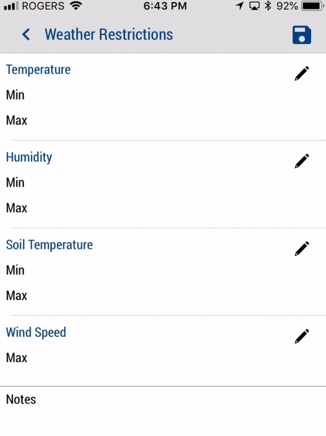
- Weather Restrictions – tap the blue bar to display the form, then tap the pencil icon to add minimum/maximum values for each category
- Add Notes
- Note: For customers subscribing to the Ag Premium Weather add-on, a warning will appear on a work order if weather conditions are outside of minimum/maximum settings.
- Comments – add notes as needed
- Tap the disc
 icon to save changes, to return to the Work Orders – Planned screen
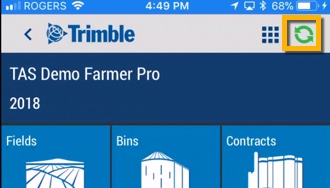
- Sync changes with the online account when you’re within cellular or wi-fi range, by returning to the home screen and tapping the green sync
 icon (top right)
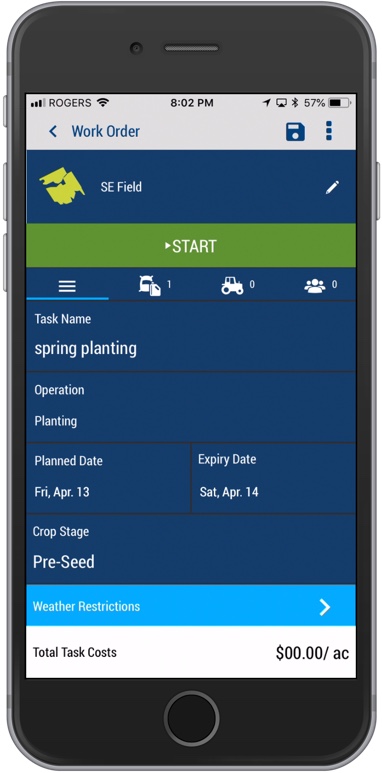
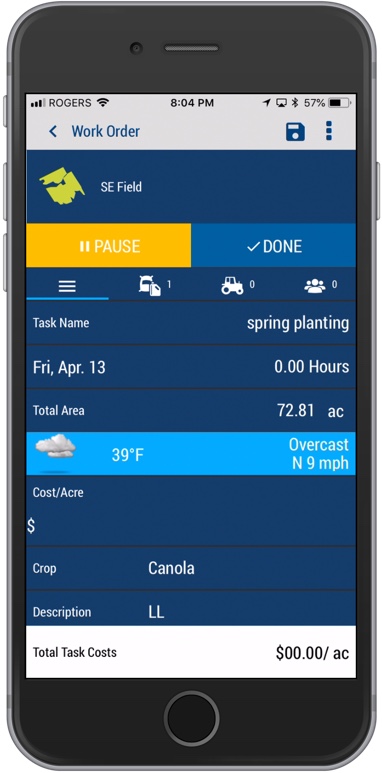
When the operator is ready to begin the task, go to the Work Order tile and and click the START button. The operator can also PAUSE to stop the counter. Click DONE to record the total task time, which appears as a cost per acre at the bottom of the work order screen.
And that’s not all. Watch for more step-by-step guides for Work Orders coming soon, or contact support.


